
Help Centre › Clients & patients
Clients & patients
Register clients, add their animals, keep contact details current, and find any record again in seconds.
In FastVet a client is the person who owns the account, and a patient is an animal belonging to them. One client can have any number of patients, and everything clinical and financial hangs off that pair.
Registering a new client#
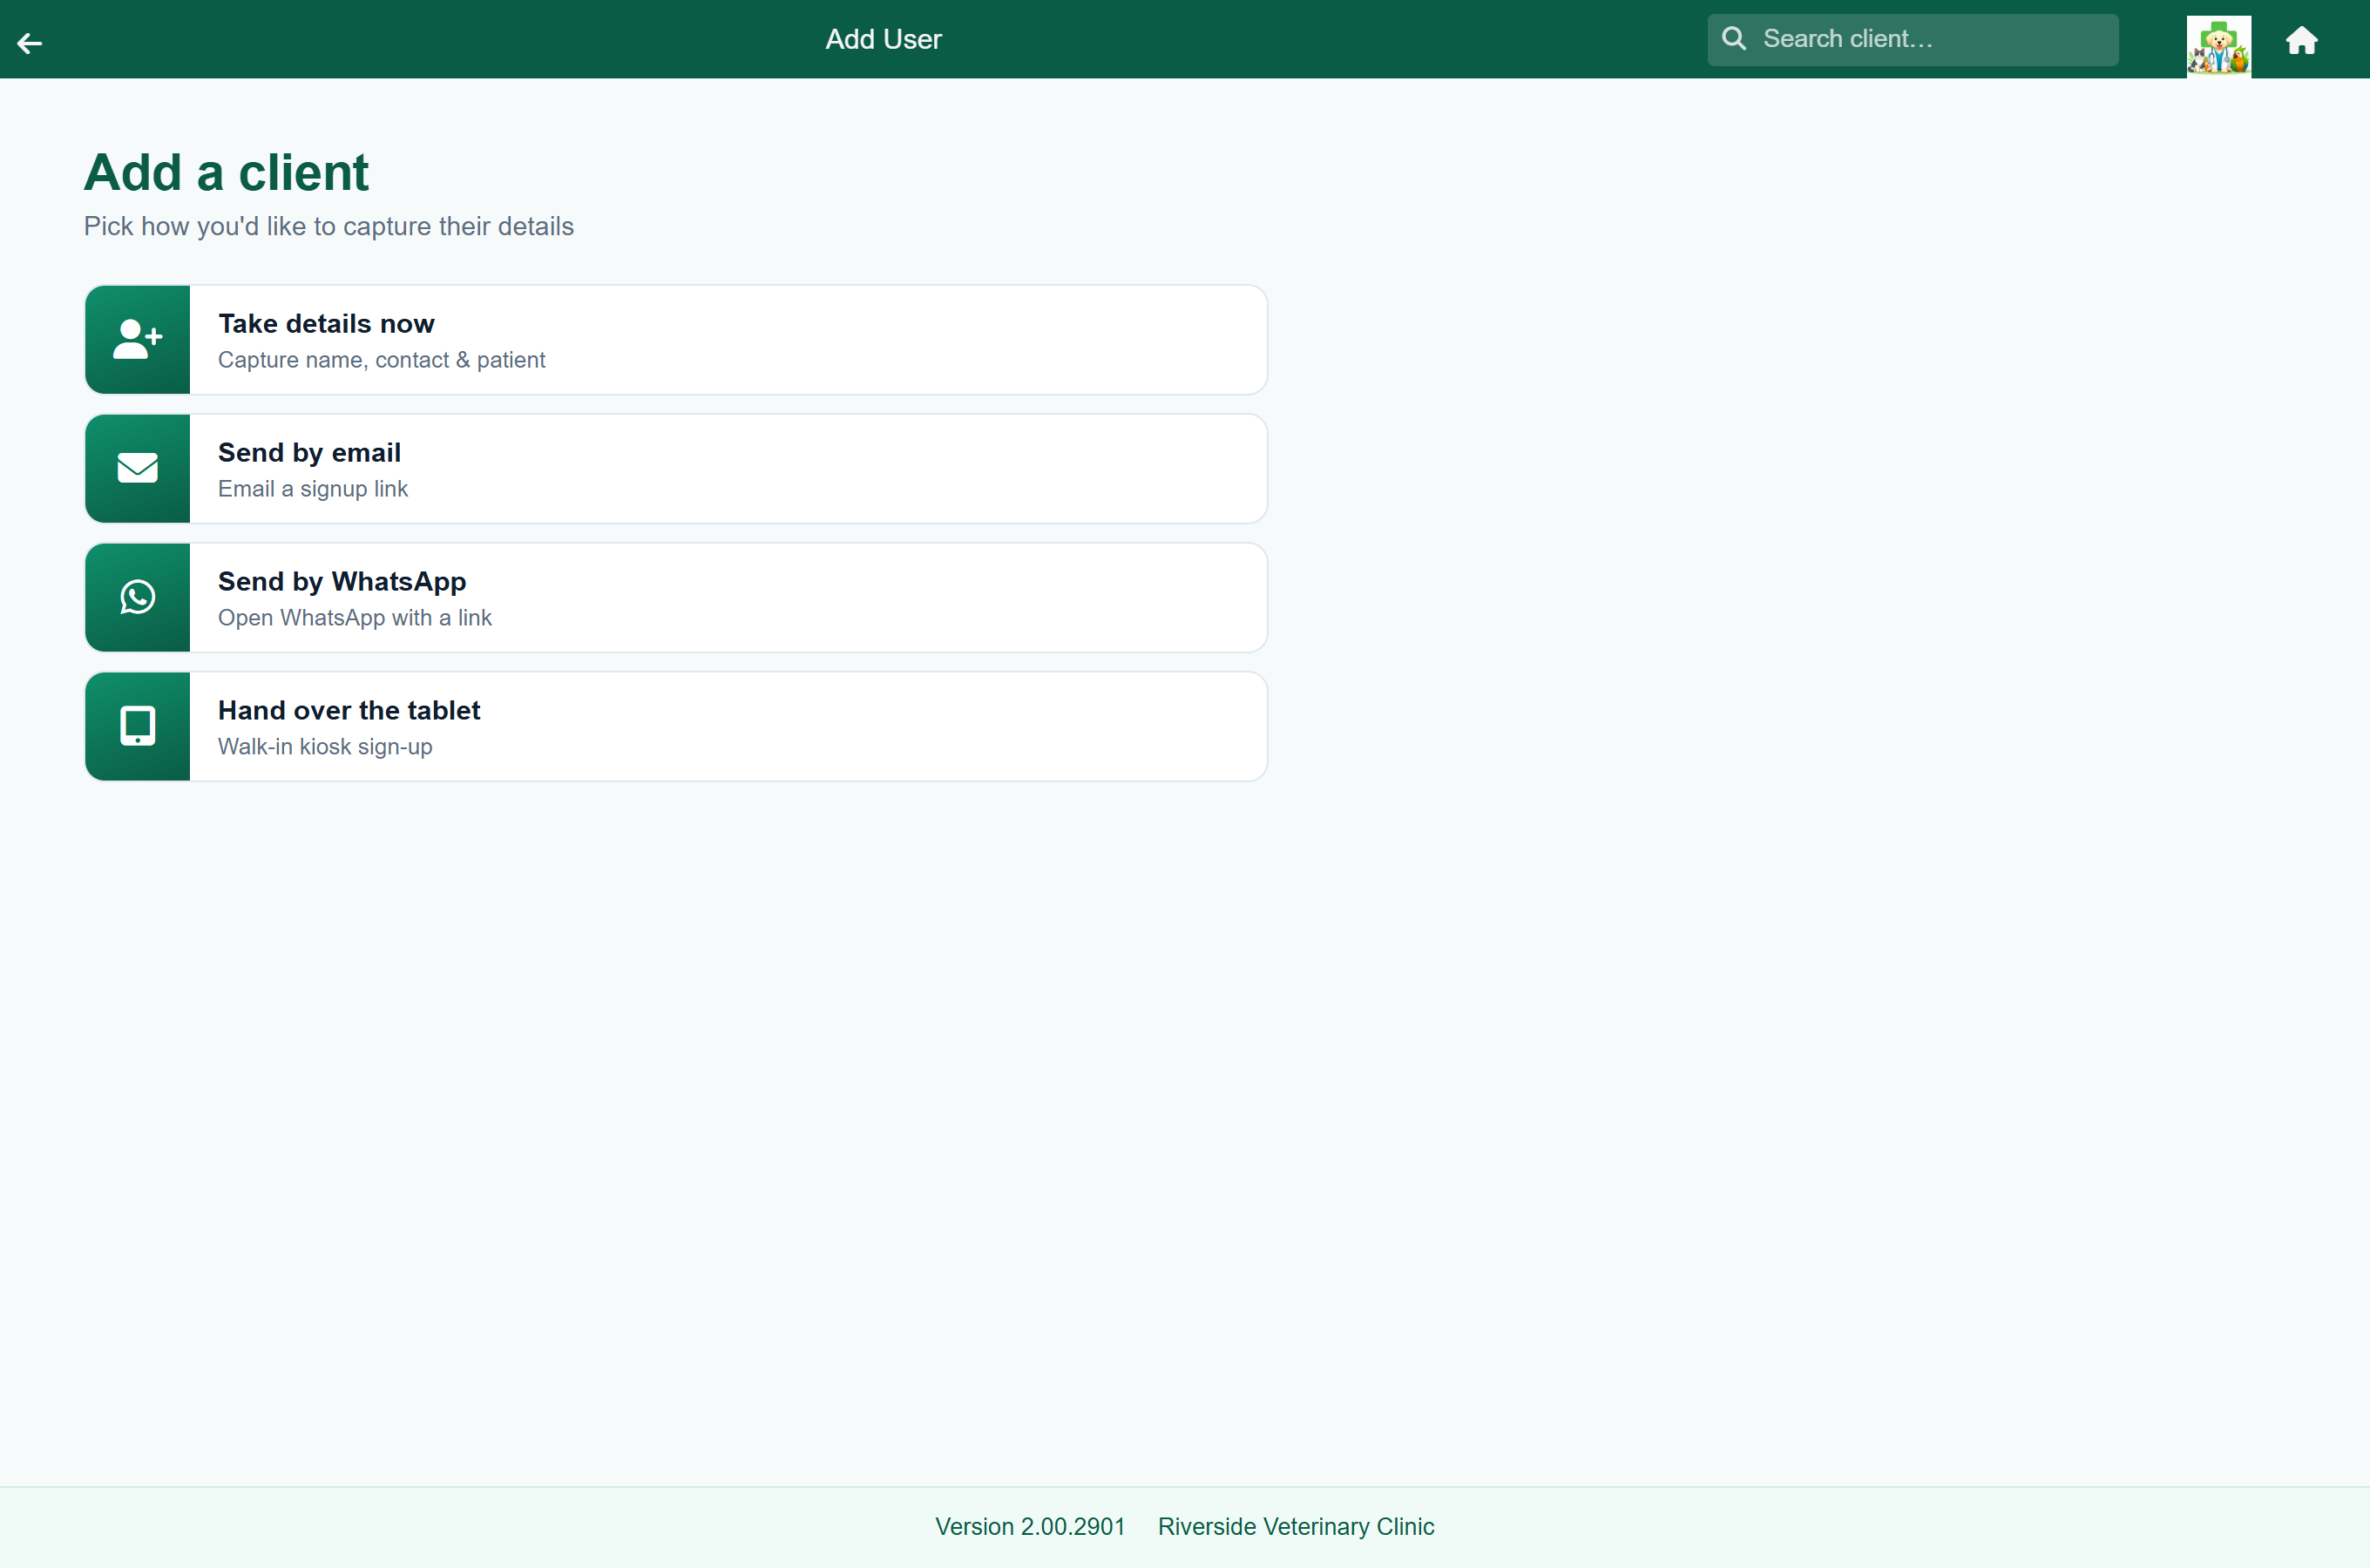
There are four ways in, and the one you pick depends on who is doing the typing.
Home›New Client
| Option | Use it when |
|---|---|
| Take details now Classic: “Add New Client” | You are taking the details yourself. Opens the full registration form — addresses, partner, emergency contact, VAT number and invoice notes. |
| Send by email Classic: “Email Link to add client” | You would rather the client typed their own details. FastVet emails them a secure link to a form, and their answers come straight back into the record. |
| Send by WhatsApp Classic: “Whatsapp Link to add client” | The same signup link, sent over WhatsApp. Enter their number with the country code, or leave it blank to pick the contact in WhatsApp yourself. |
| Hand over the tablet Classic: “Tablet Sign Up” | A walk-in fills the form in themselves on a tablet at the desk. |
The short form, step by step#
When you are already part-way through something — putting a walk-in on the consult queue, or taking a booking — pressing New Client gives you a short one-screen form instead of the full one, so you can get back to what you were doing. It captures the client and their first patient together.
Home›New Consultation›New Client
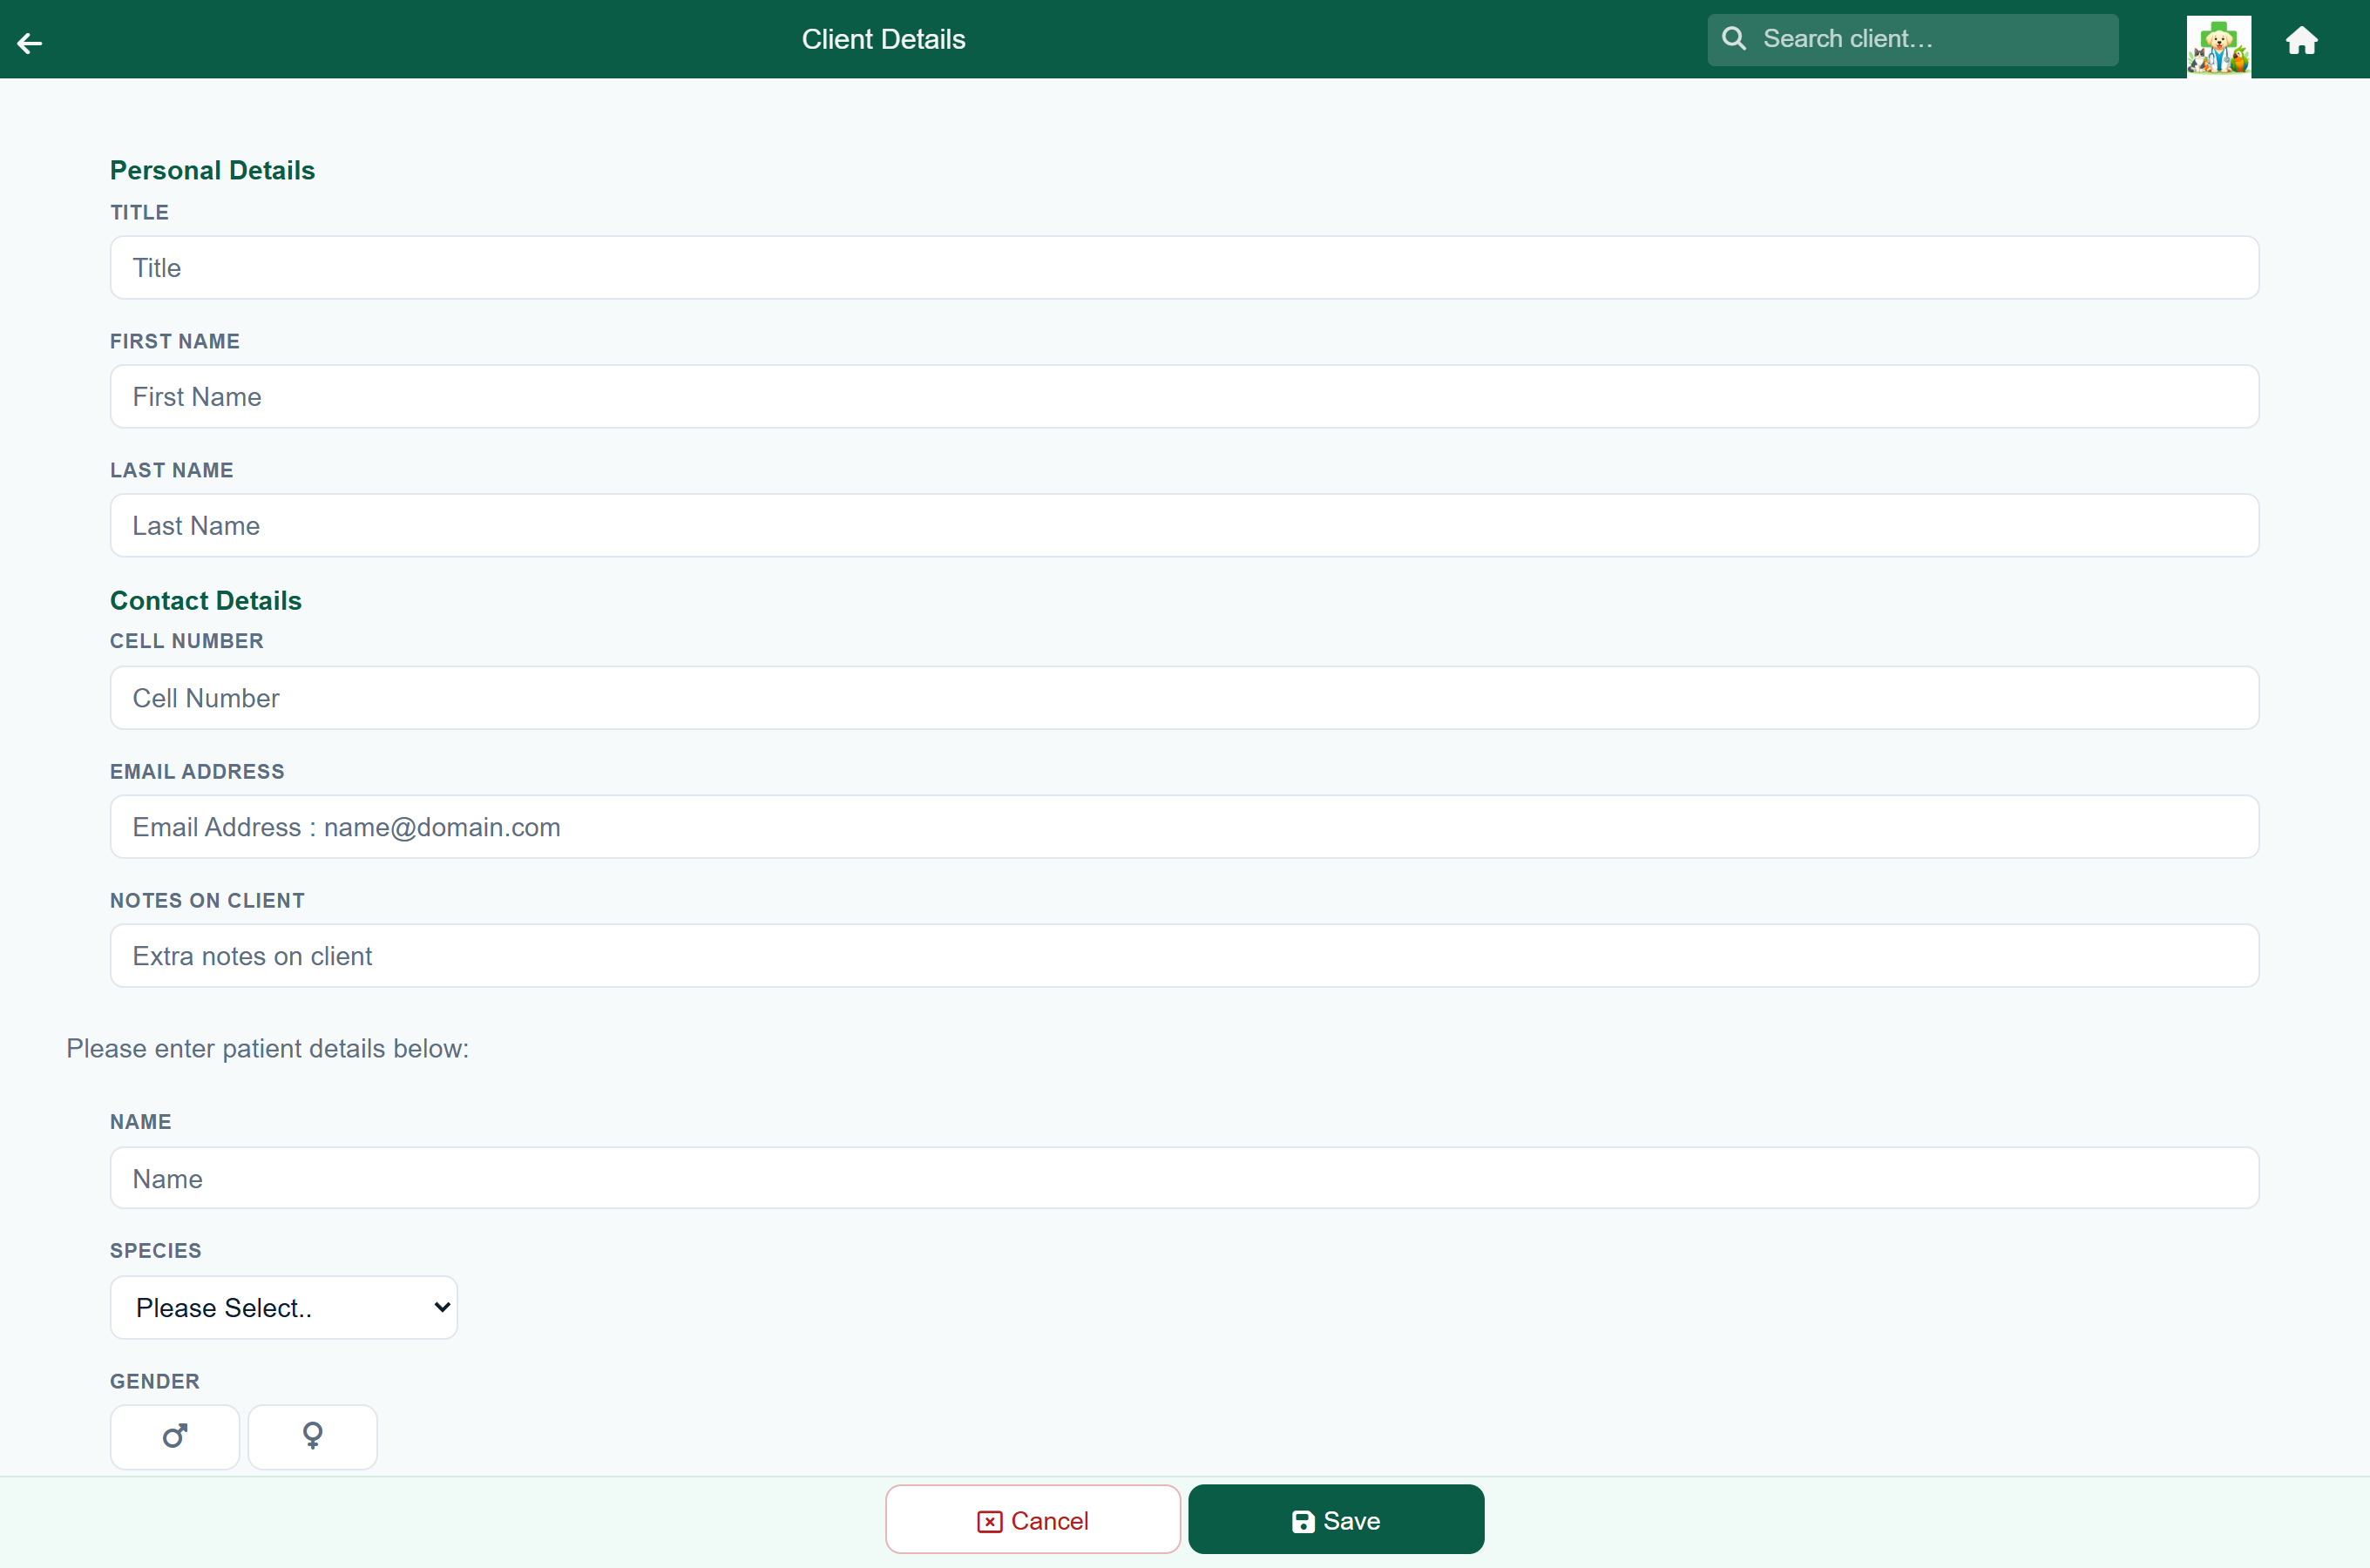
- Enter the client's first name, last name and cell number. These three are required — everything else can wait.
- Add an email address if you have one. Without it the client cannot be sent invoices, reminders or statements, and cannot use the client portal.
- Under the patient section enter the animal's name and pick a species — Feline, Canine, Exotic or Production Animals. Both are required. Tap the male or female symbol if you know it.
- Use Comment on Patient for something lasting and worth knowing every visit — “nervous with clippers”, “muzzle for nail trims”.
- On the walk-in path you also get Reason for Visit. Fill it in — this is what the vet reads on the queue card, and leaving it blank puts them on the queue with no reason at all.
- Press Save in the footer.
Full client details#
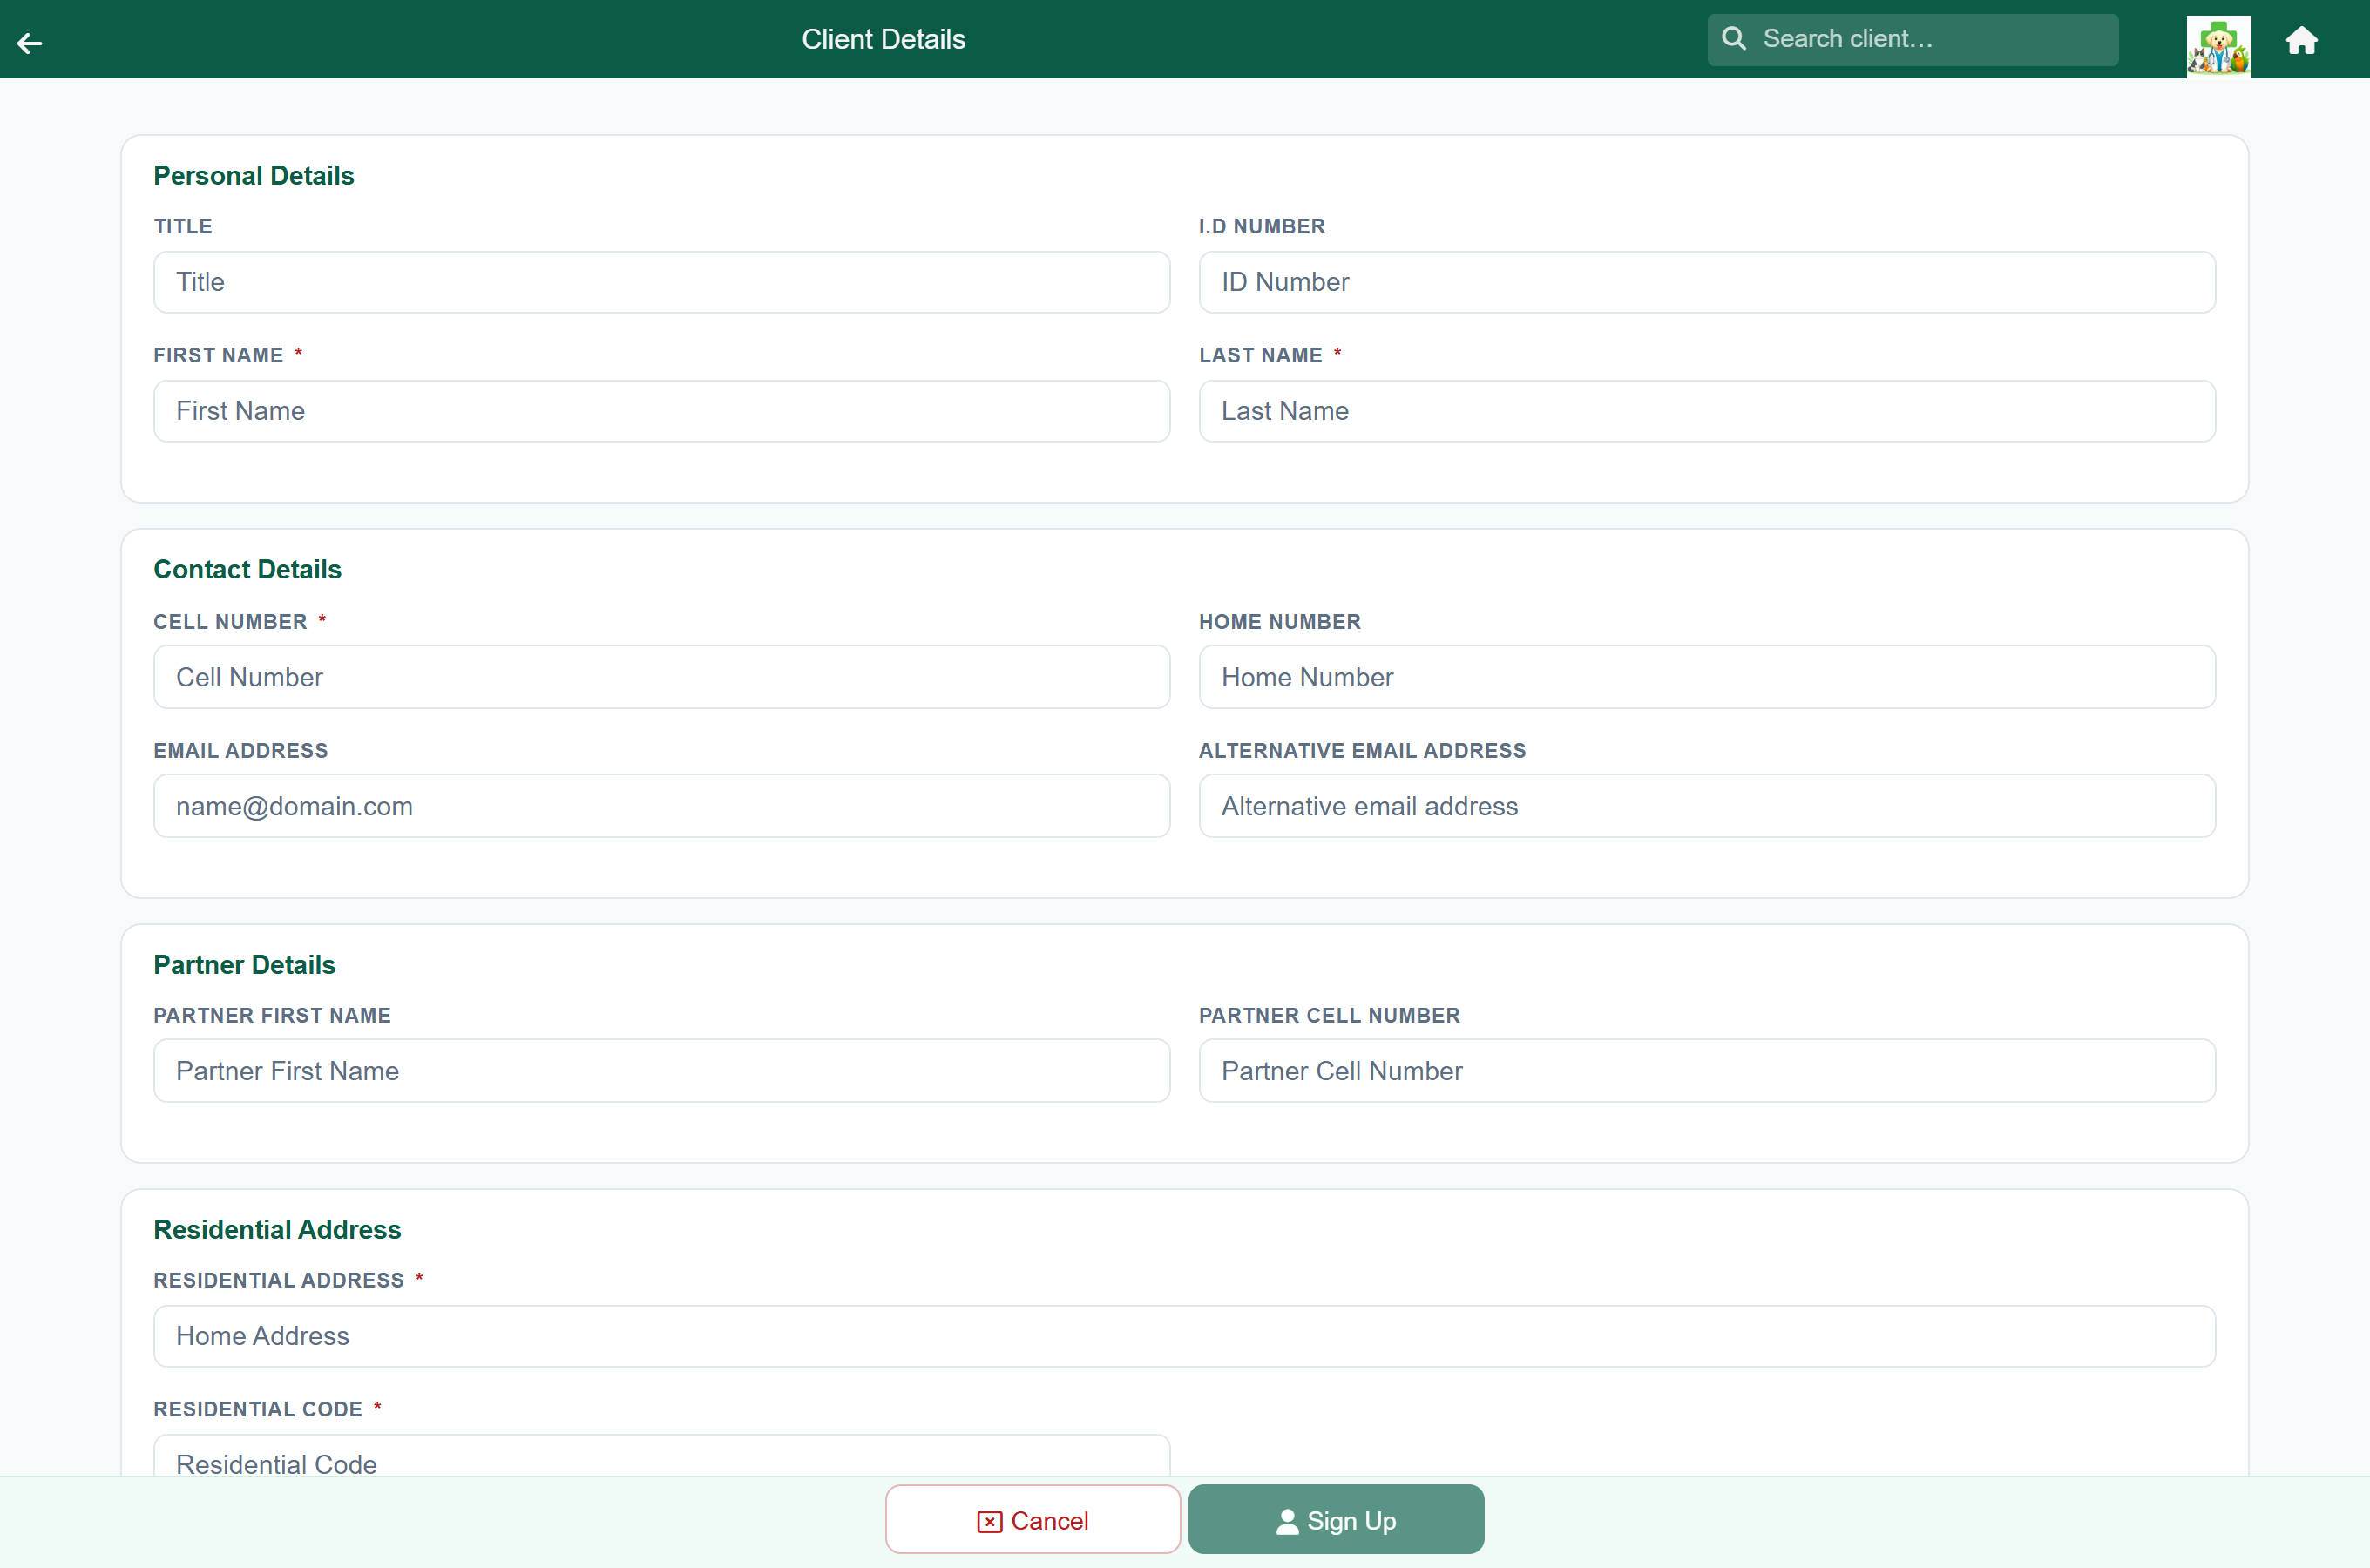
The full form captures everything the practice might need for billing and emergencies.
| Group | What goes here |
|---|---|
| Personal details | Title, ID number, first and last name. |
| Contact details | Cell, home number, email, and an alternative email. Invoices and statements go to the main email; the alternative can be copied in. |
| Partner details | A second person on the account who may bring the animal in. |
| Residential / postal address | Used on invoices and statements. |
| Emergency contact | Who to call if the owner cannot be reached while their animal is with you. |
| Additional information | VAT number, private notes about the client, and a note that prints on their invoices. |
The client record#
Opening a client takes you to Account Details — the hub for that family. From here you can see their patients, their balance, and start almost any piece of work.
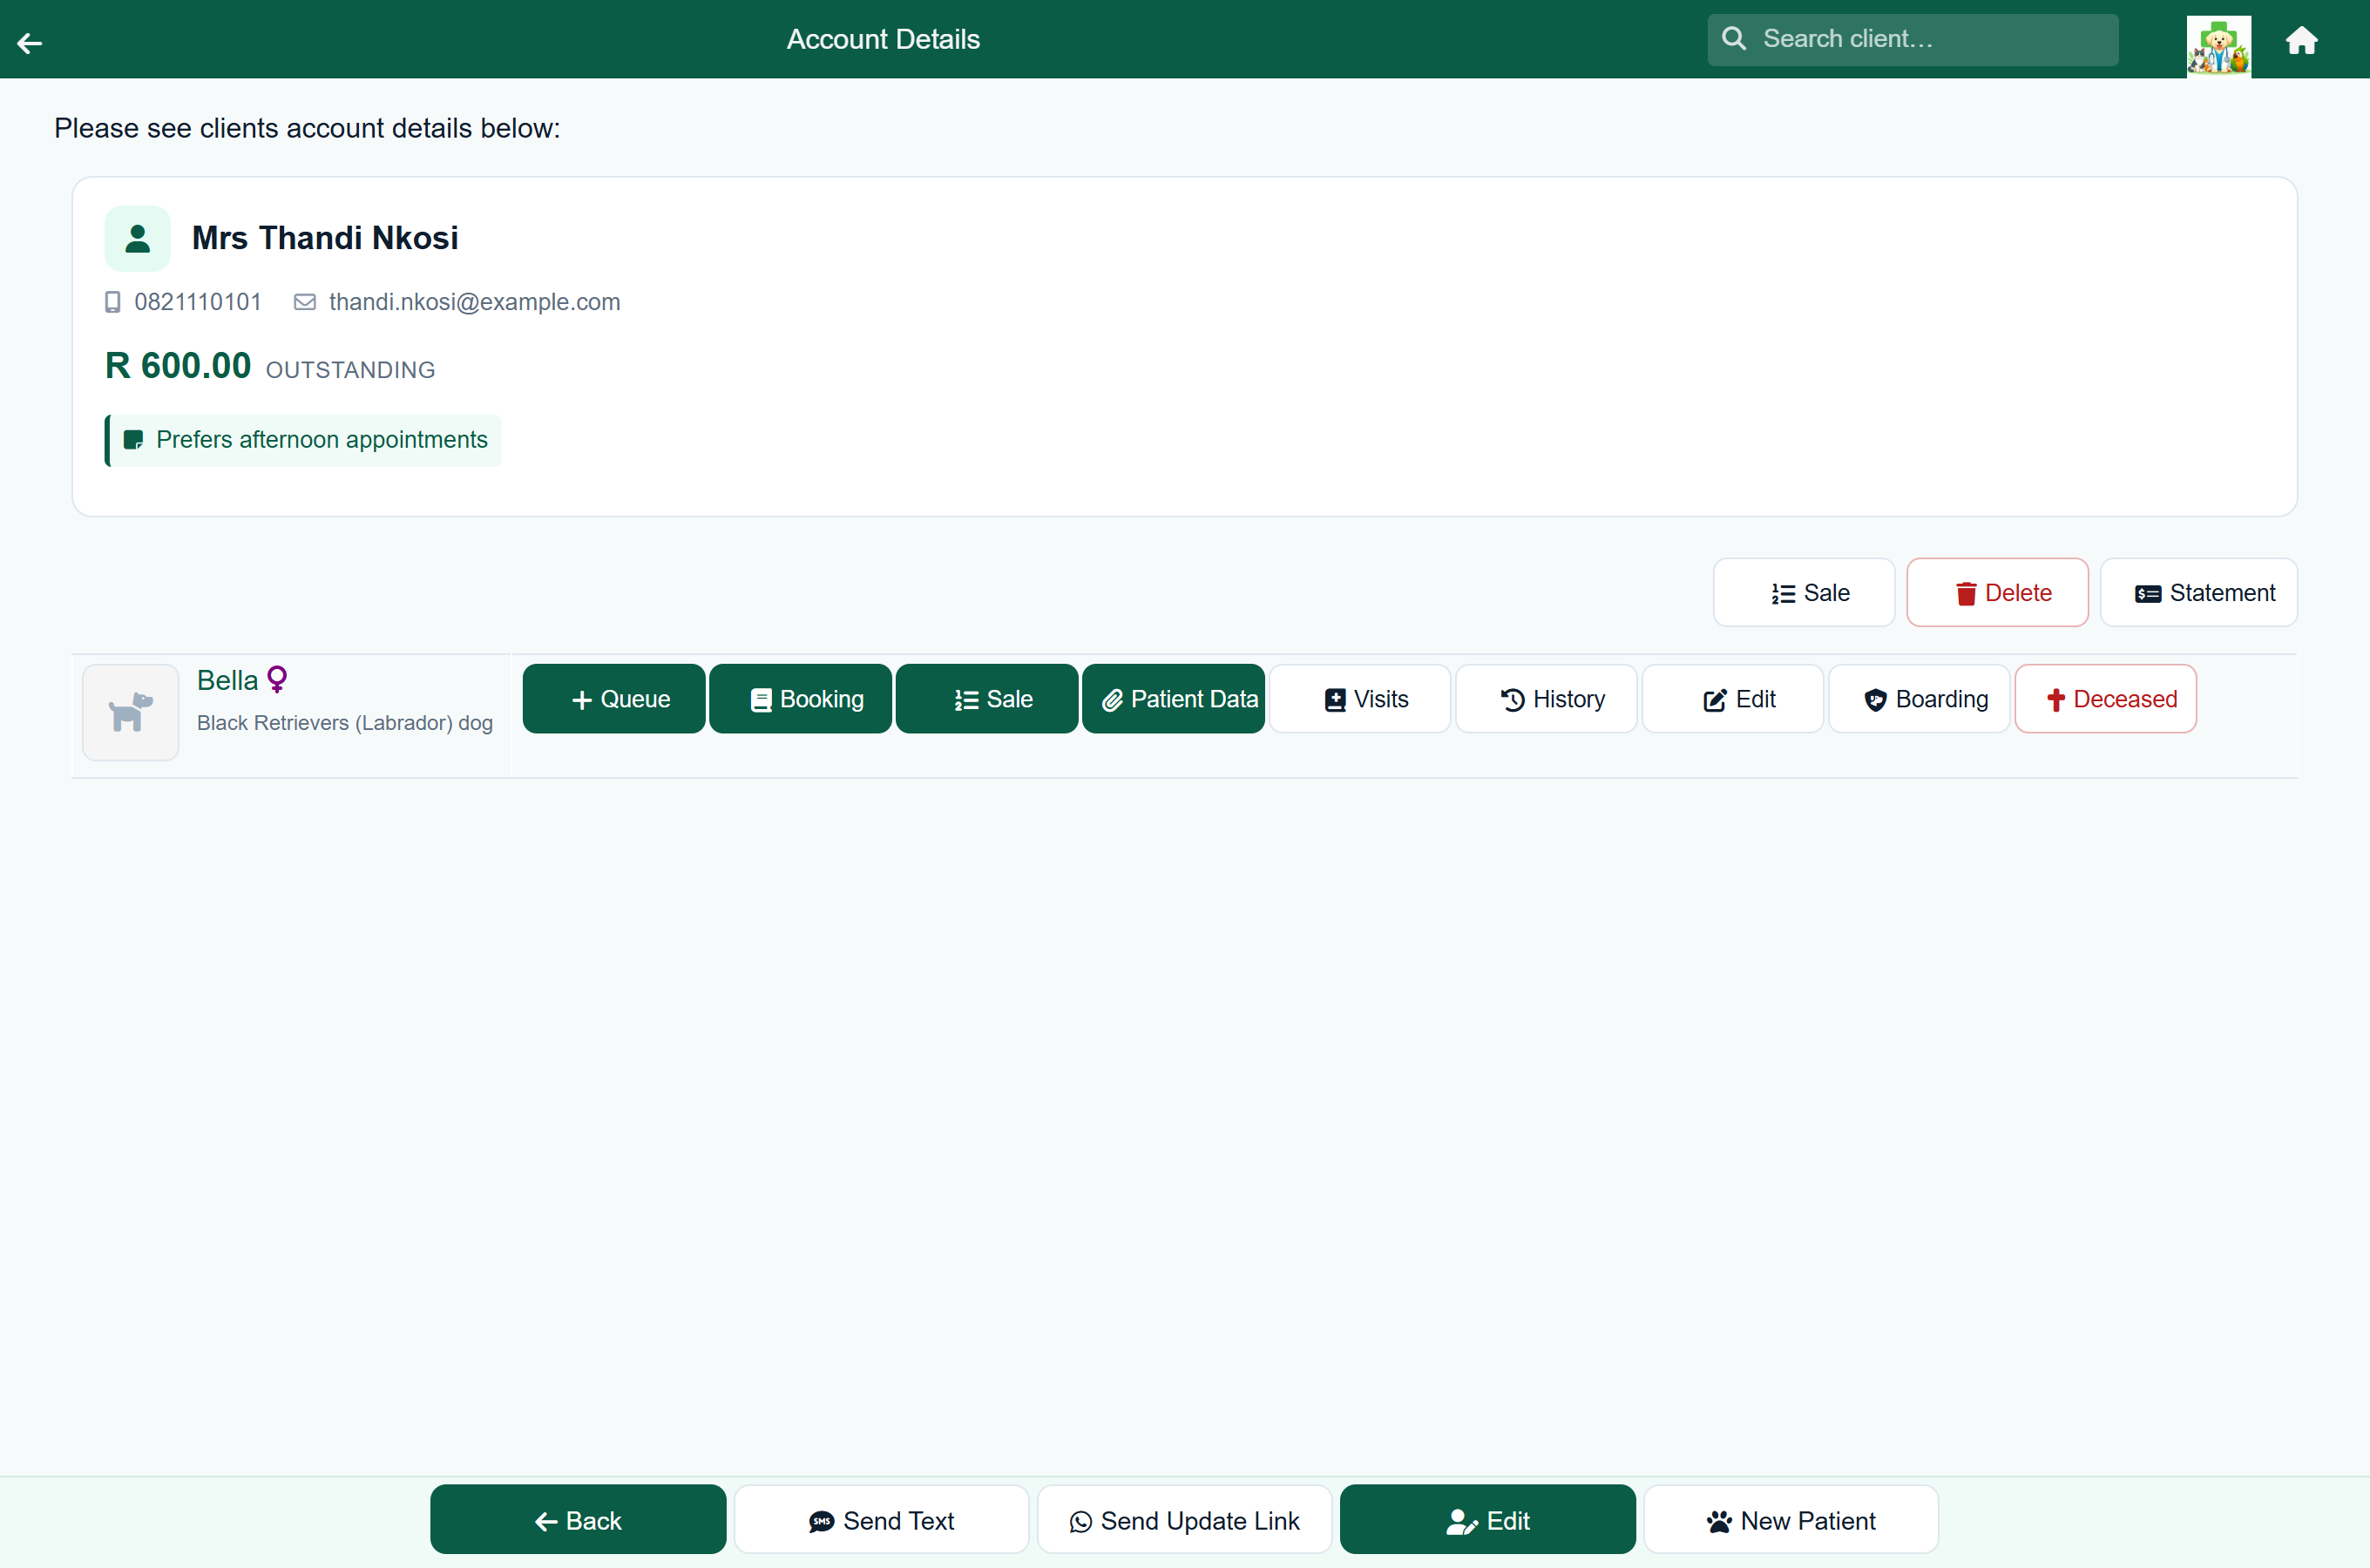
Under the contact details sits the balance, and under that — tinted, so it is not mistaken for another contact field — any note your practice has written about this client. It is the same note as Notes on client on the edit form, and the client never sees it.
Across the top of the record:
- Statement opens their account — every charge and payment, with the buttons to print or email a statement, take a payment, or reverse something. It does not send anything by itself.
- Sale starts an over-the-counter sale against their account. Each patient row has its own Sale button too, for when the sale belongs to a particular animal.
- Map opens their residential address in maps, where one has been geocoded.
- Delete marks the client as deleted; the button becomes Undelete afterwards.
And in the footer:
- Send Update Link opens WhatsApp with a private link the client can use to correct their own contact details. They do not need a portal login — the link itself authorises just their record.
- Edit changes the client's own details.
- New Patient adds another animal to this client.
Each patient then gets its own row of buttons, and this is where most of a receptionist's day actually happens:
| On the patient row | Does |
|---|---|
| Queue | Sends this animal to a queue — see Putting a patient on a queue. |
| Booking | Starts an appointment for this animal. |
| Sale | An over-the-counter sale recorded against this animal rather than just the account. |
| Patient Data | Documents and photographs — see below. |
| Visits | Every consultation this animal has had. |
| History | The full clinical history. |
| Edit | The patient record — species, breed, colour, chip, photo. |
| Boarding | Checks this animal into boarding. |
| Deceased | Records the date and cause of death. Shown in red because it is not easily undone. |
Patients with a recorded date of death stay on the list, greyed out, so their history is never lost.
Adding and editing a patient#
Every animal has its own record carrying species, breed, colour, date of birth, microchip number and a photograph.
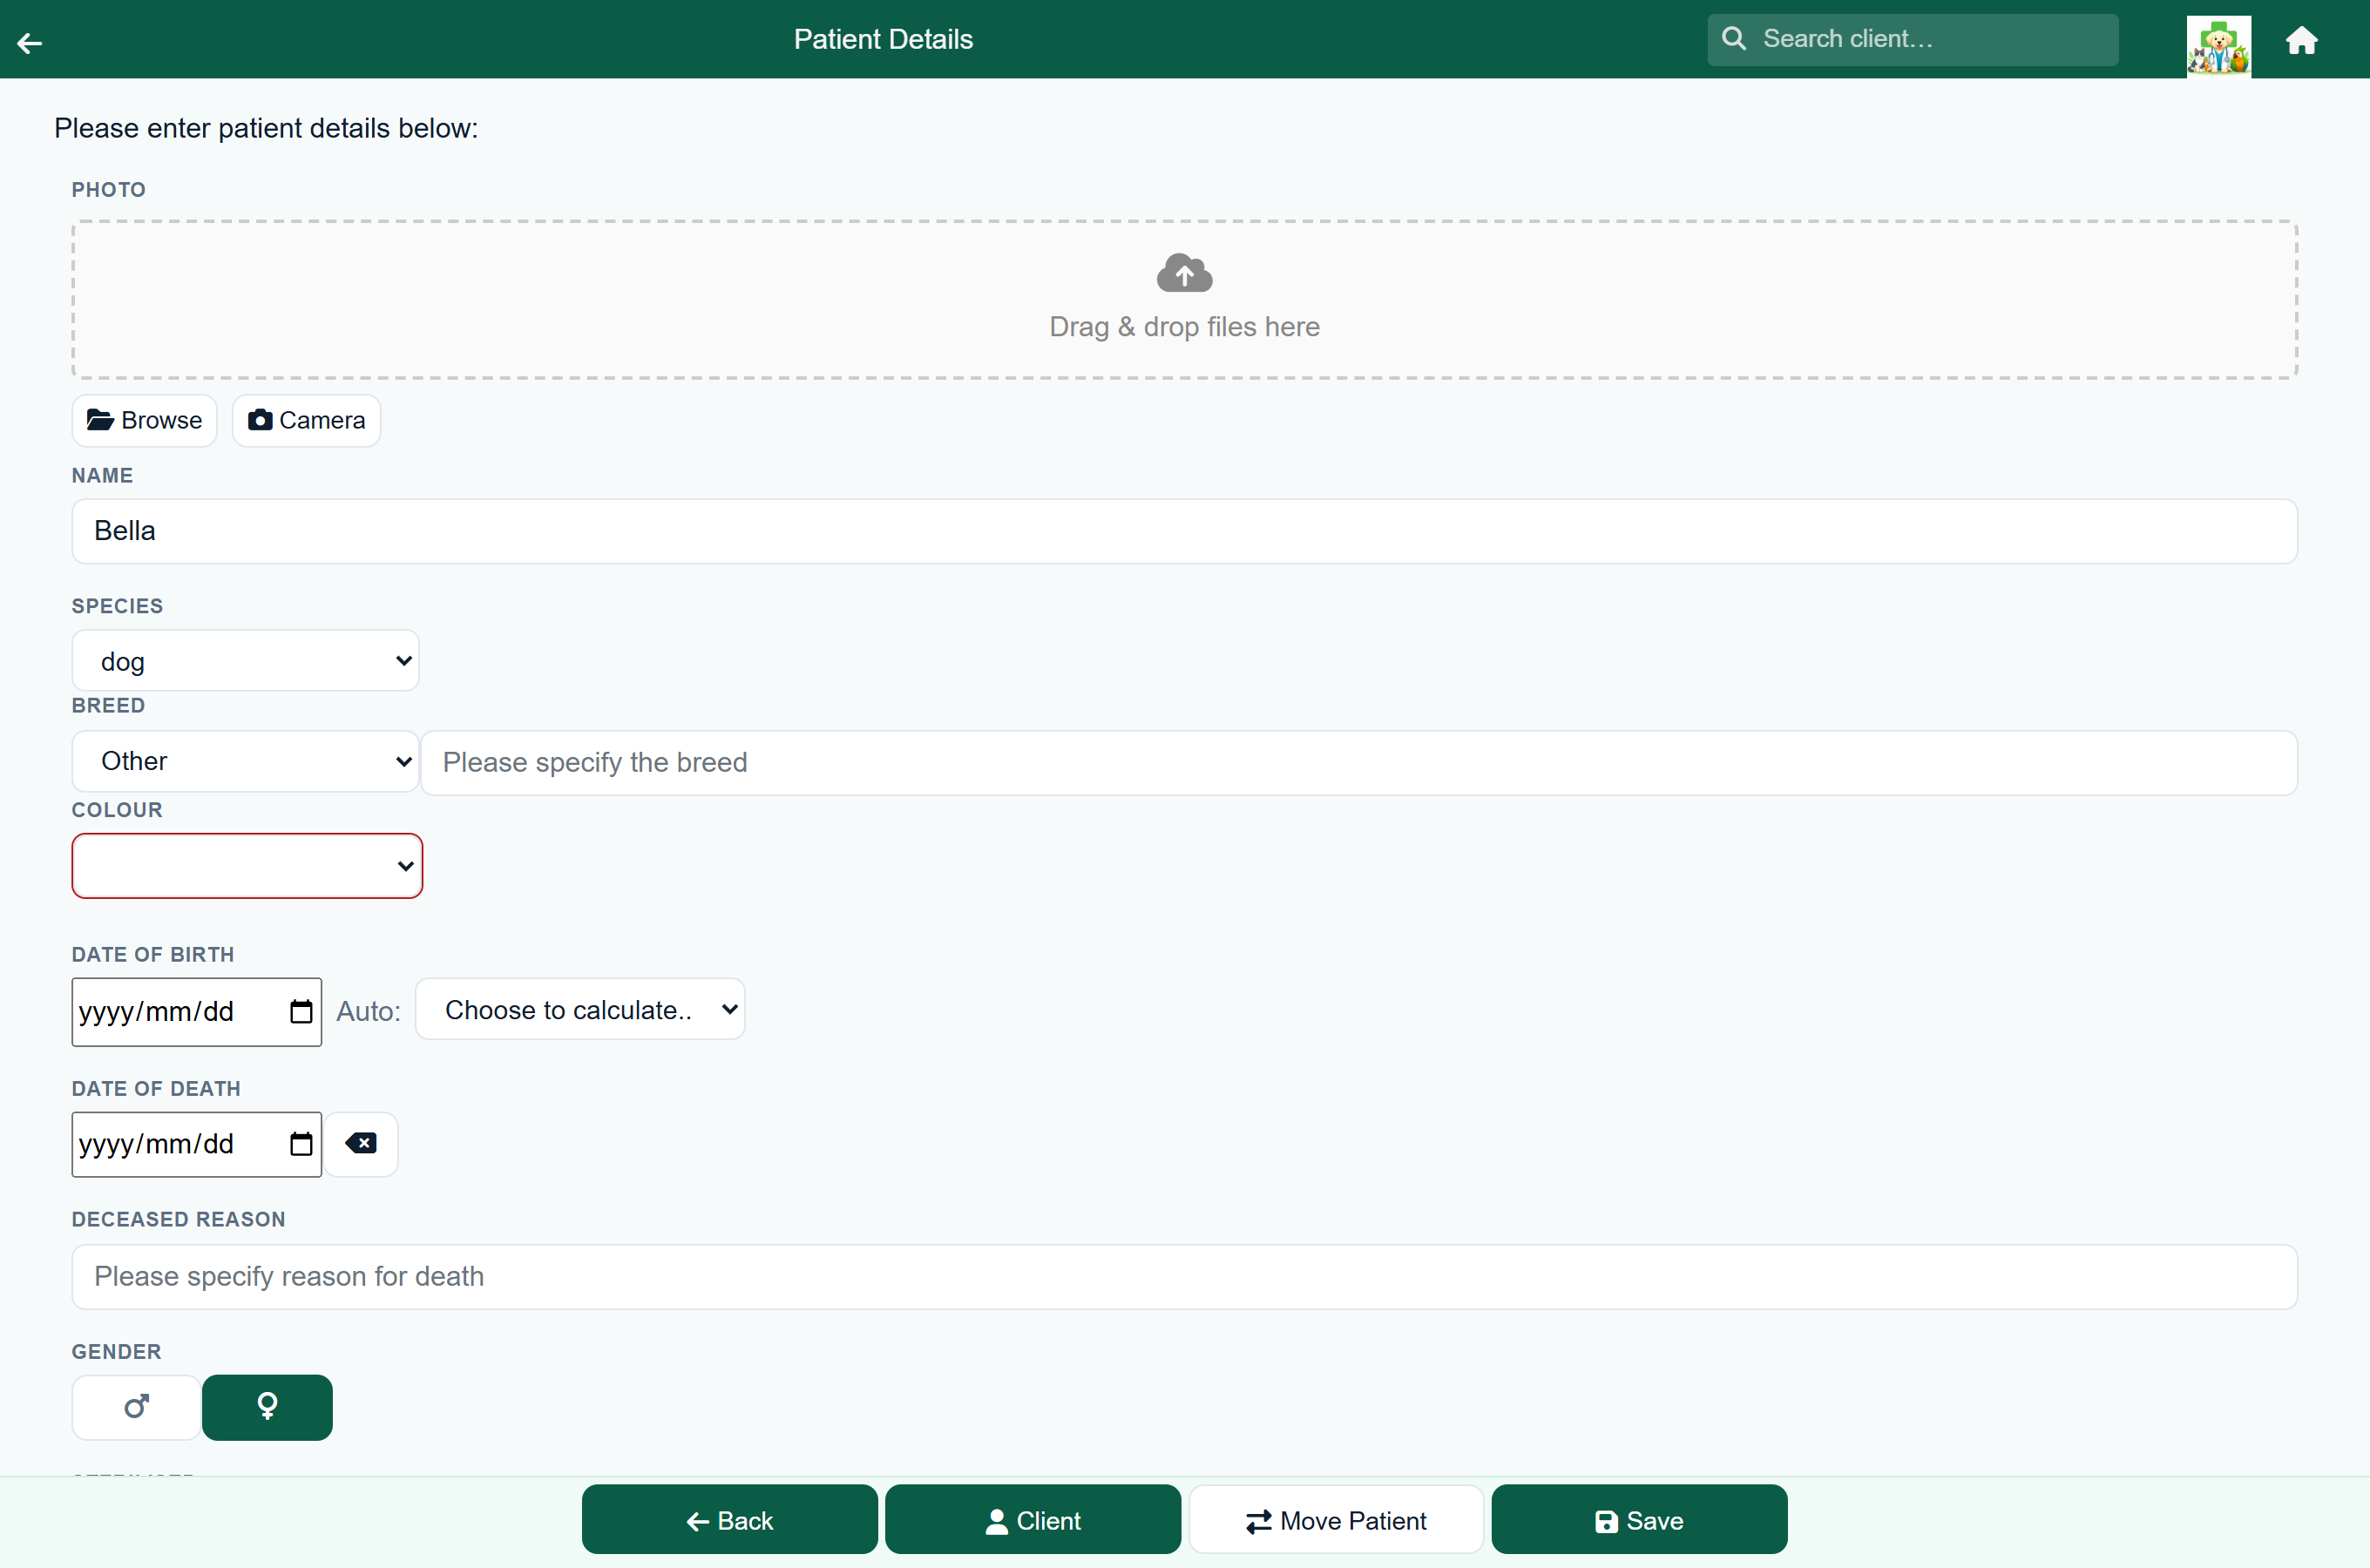
- Open the client, then choose New Patient — or tap an existing patient to edit it.
- Fill in the name, species, breed and colour. Breed and colour lists are maintained by your practice, so they stay consistent for reporting.
- Record the date of birth if known — it drives the age shown on every clinical screen.
- Add a microchip number and any sterilised or deceased flags.
- Press Save.
Moving a patient to another client#
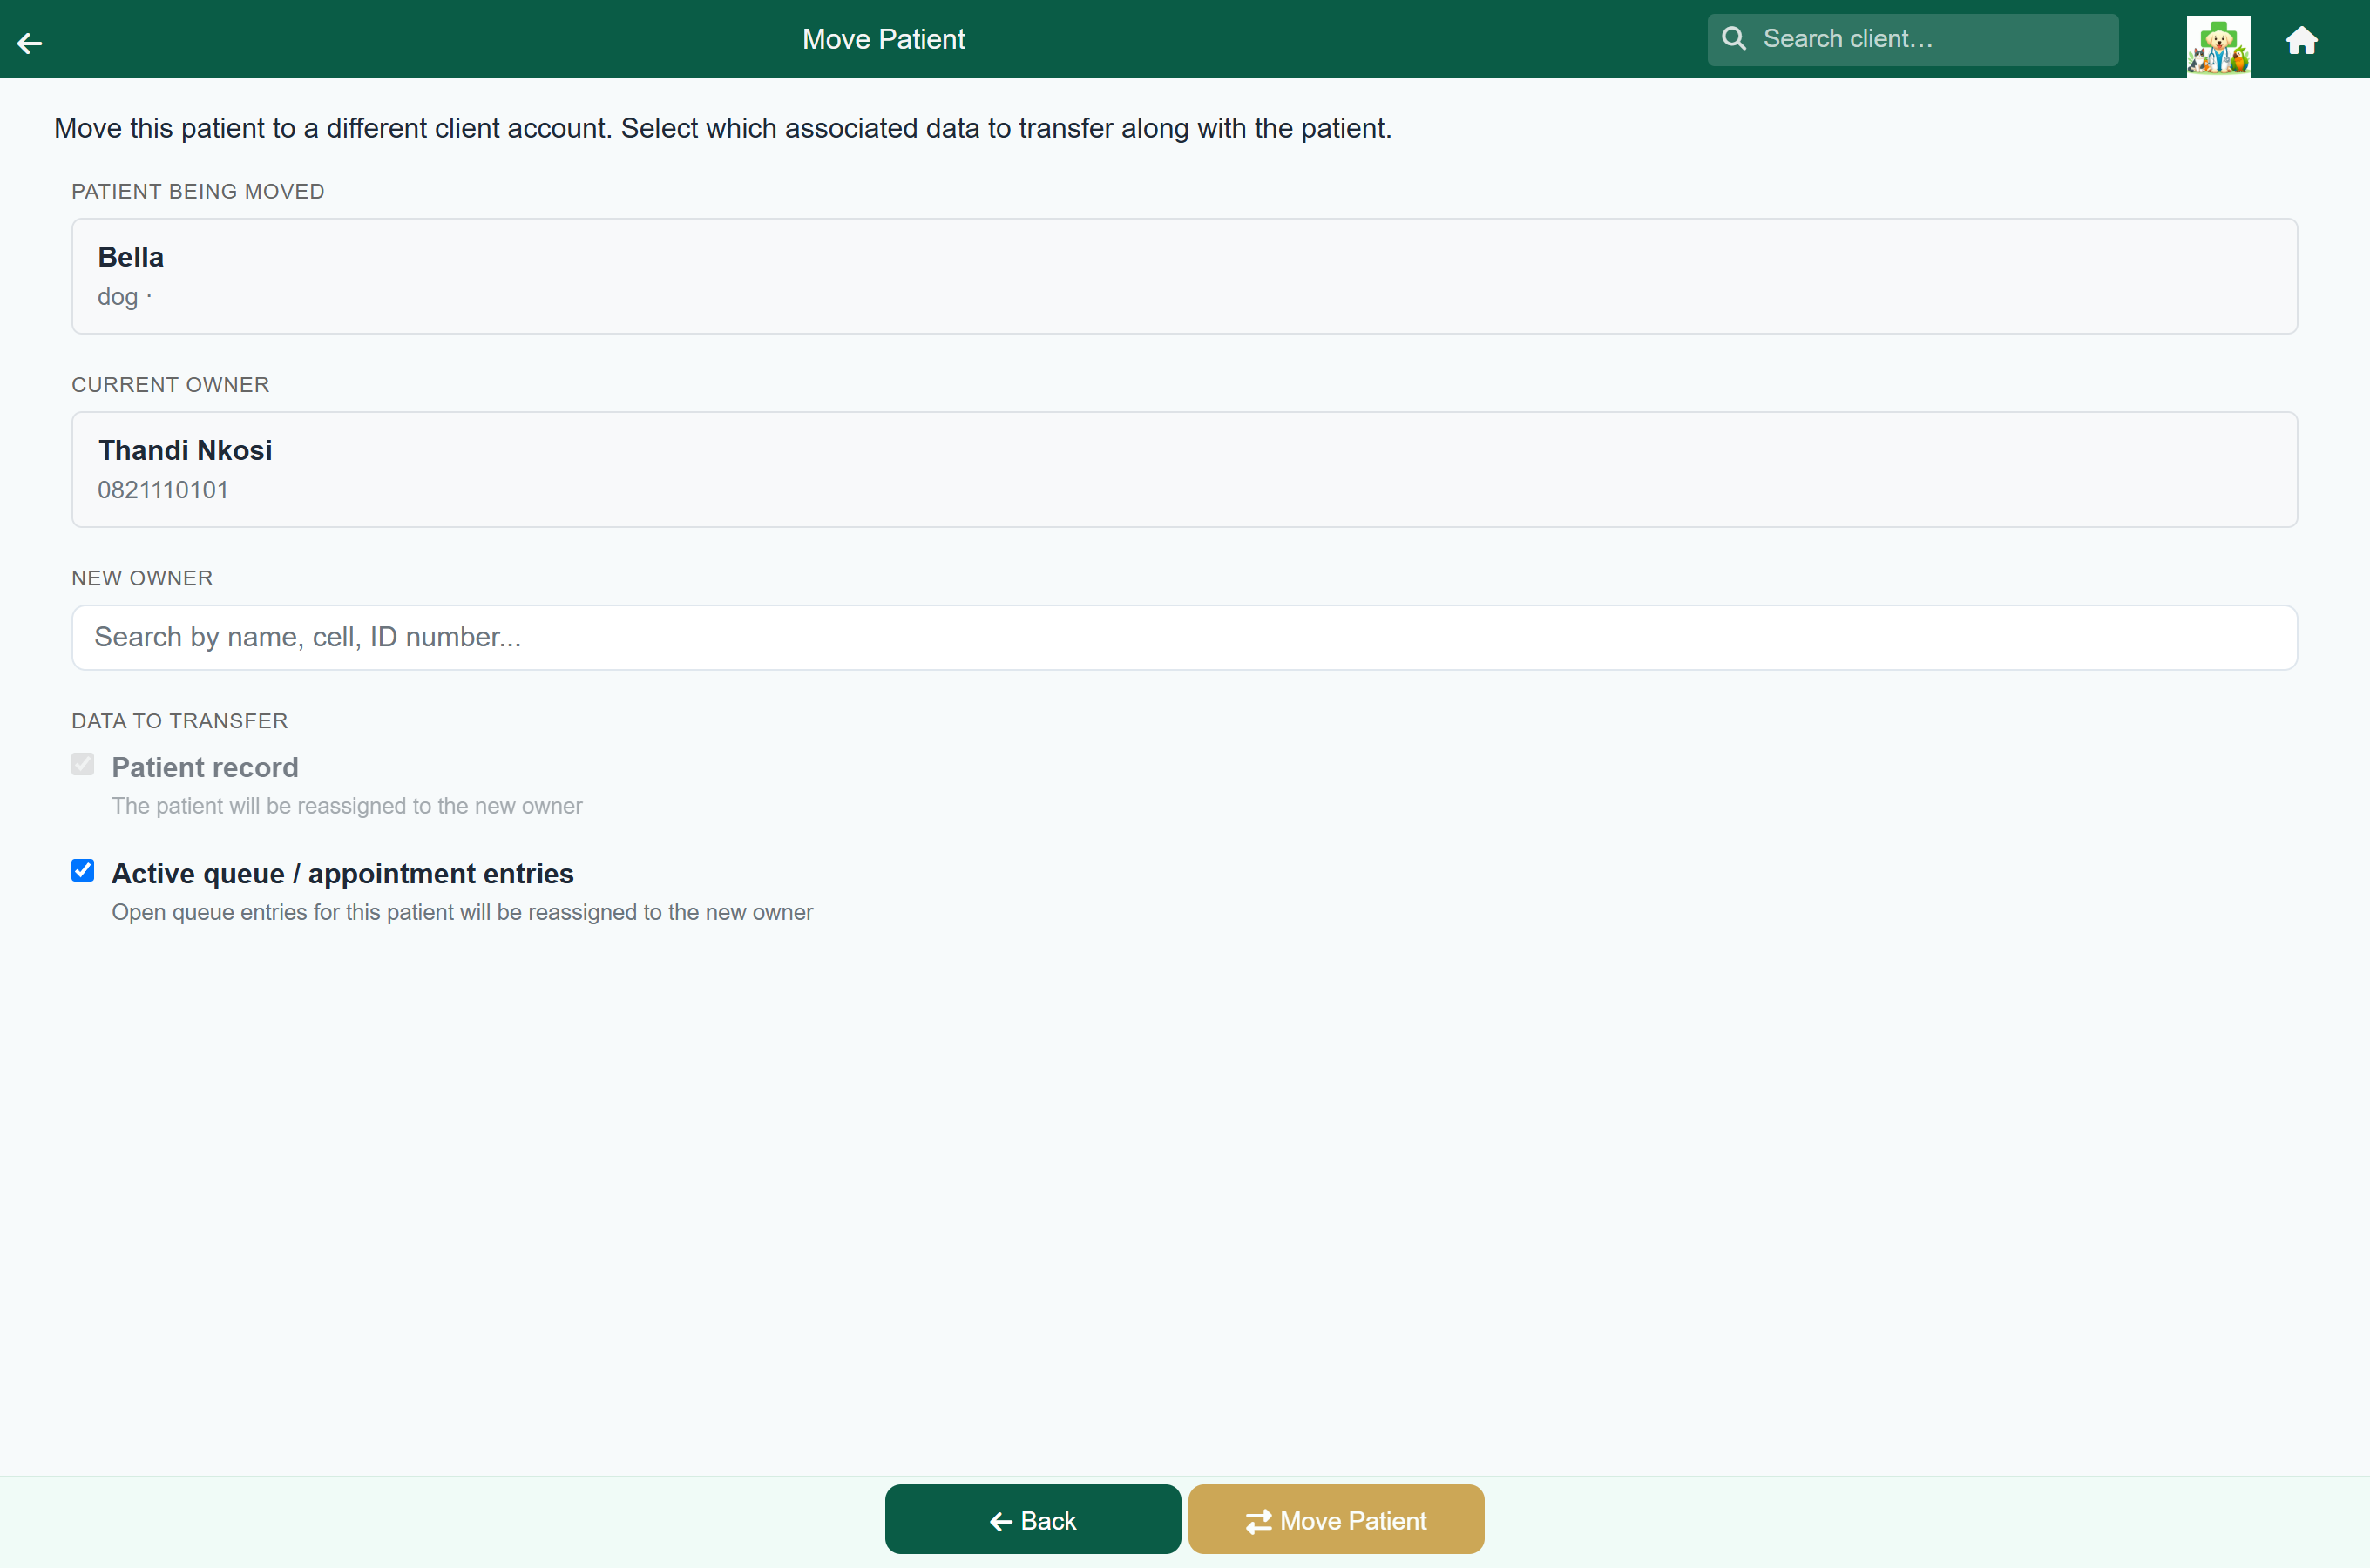
Animals are rehomed and families separate. Rather than re-creating the patient — which would strand its clinical history — move it.
Client record›Patient›Move Patient
Documents and photographs#
Patient Data holds anything you want to keep against the animal that is not a consultation note — referral letters, x-ray images, consent forms, insurance paperwork. The screen lists everything ever attached to that patient, whoever added it and whenever, so it doubles as the patient's document drawer.
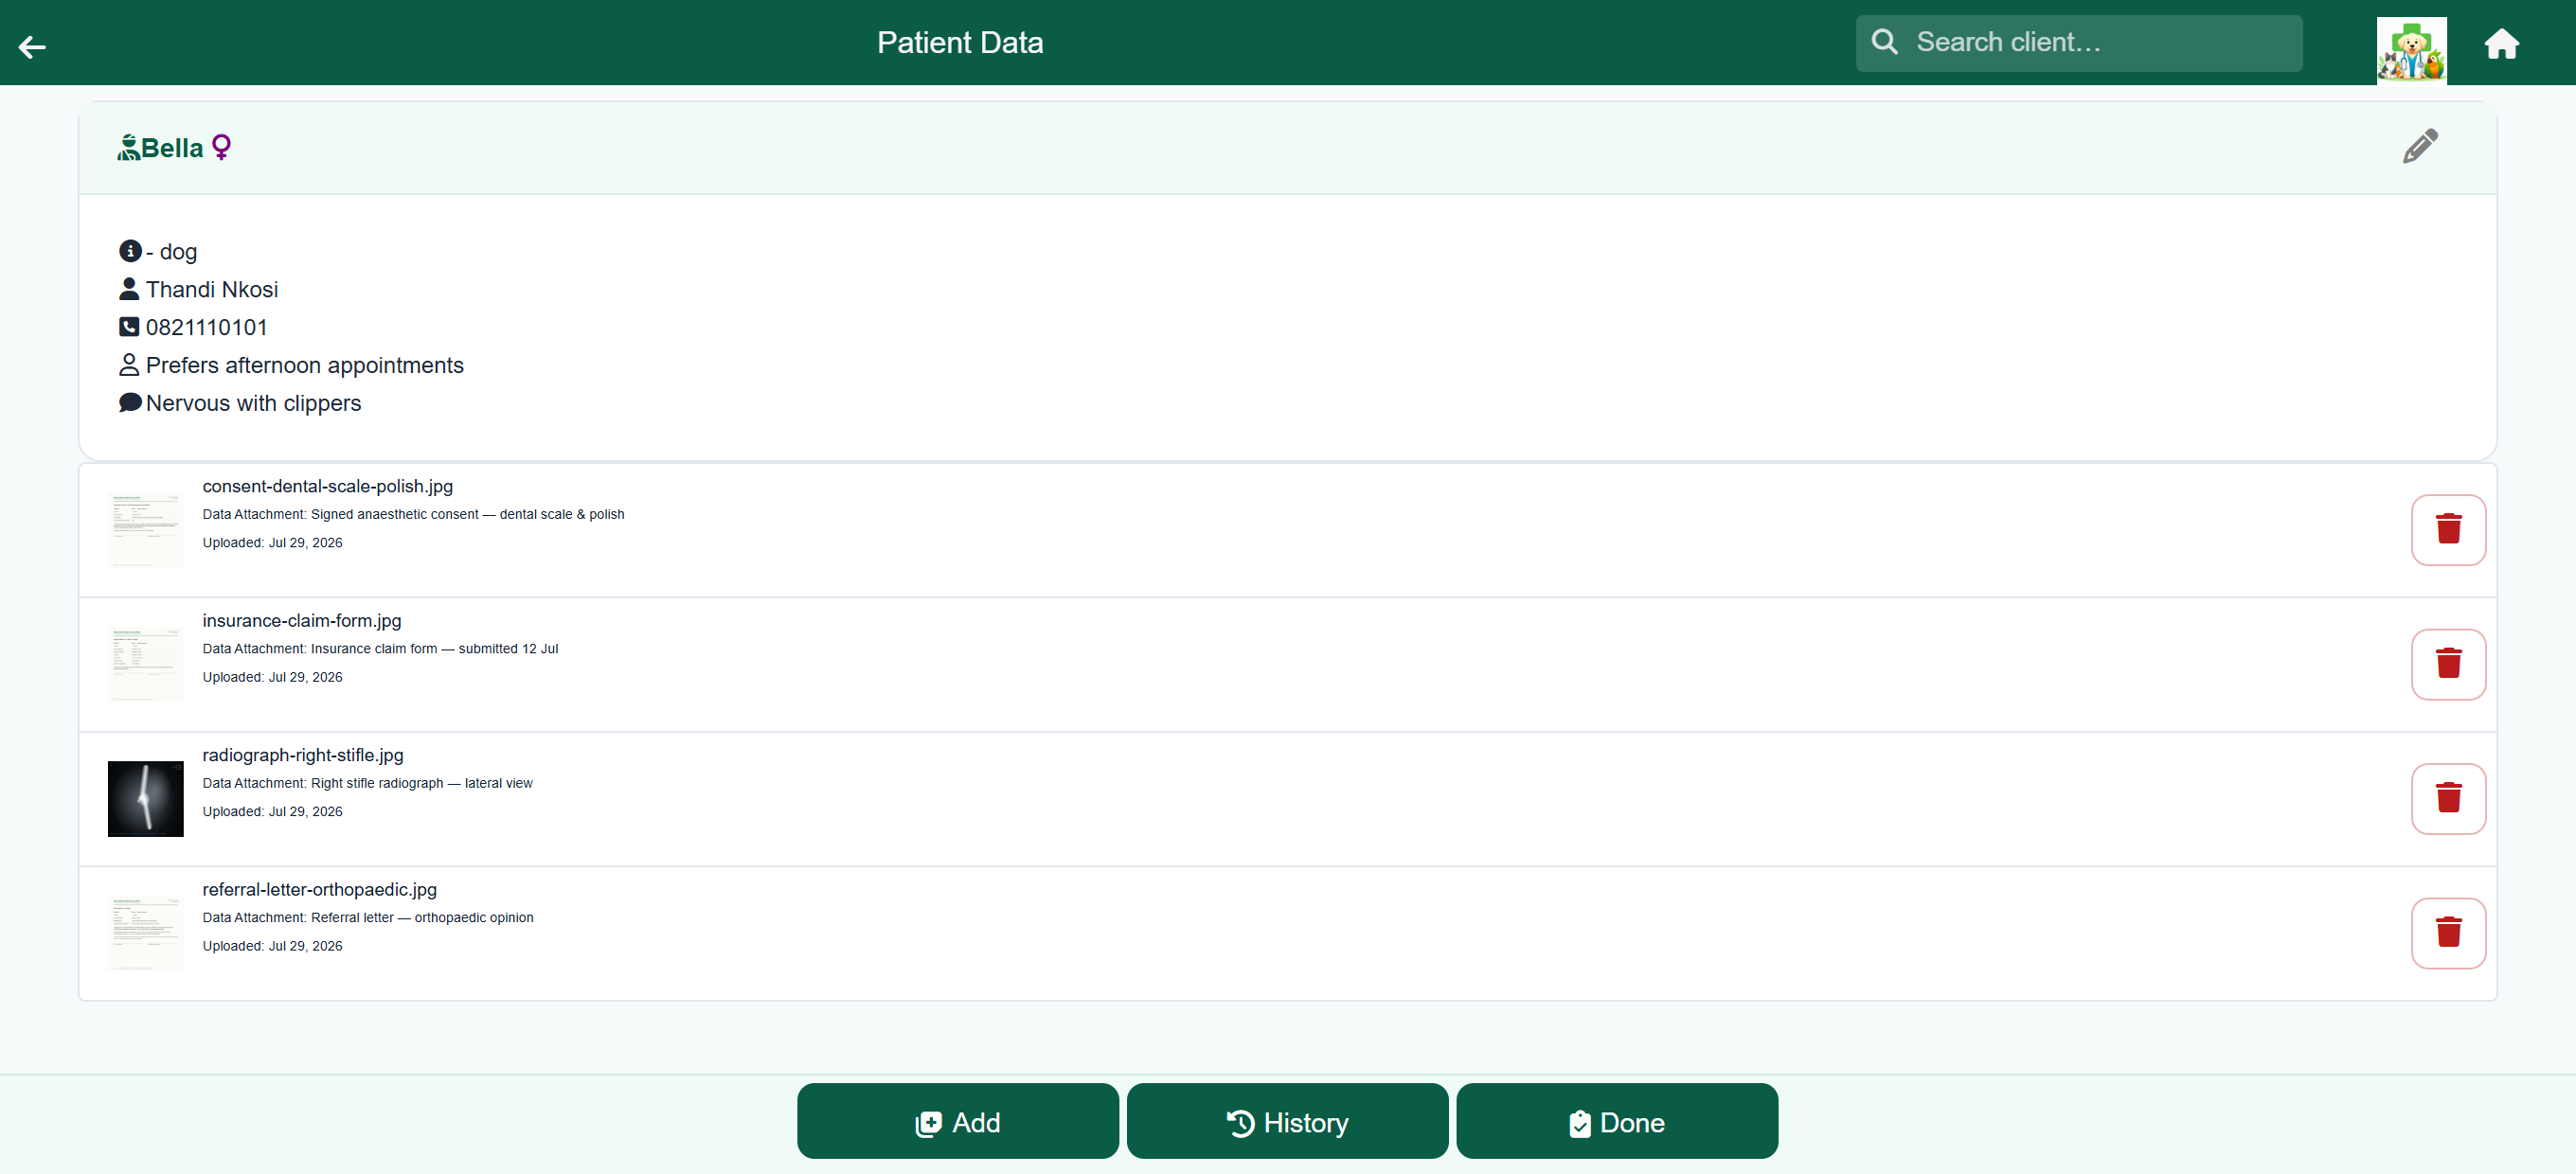
- Open the client, tap the patient, and choose Patient Data.
- Choose Add, then pick the file — or several files at once — and type a short description in Please enter comment. That description is what staff read in the list, so name the document rather than the file.
- Press Add again to upload. Everything you selected goes up together under that one description.
- Tap any row to open the document, or the red bin to remove one. Done closes the screen.
Clinical history#
History on a patient row opens the single chronological view of everything that has happened to that animal — visits and what was written at them, lab results, medication, vitals, weight trends and attached files, newest first, with filters and a search box over the lot.
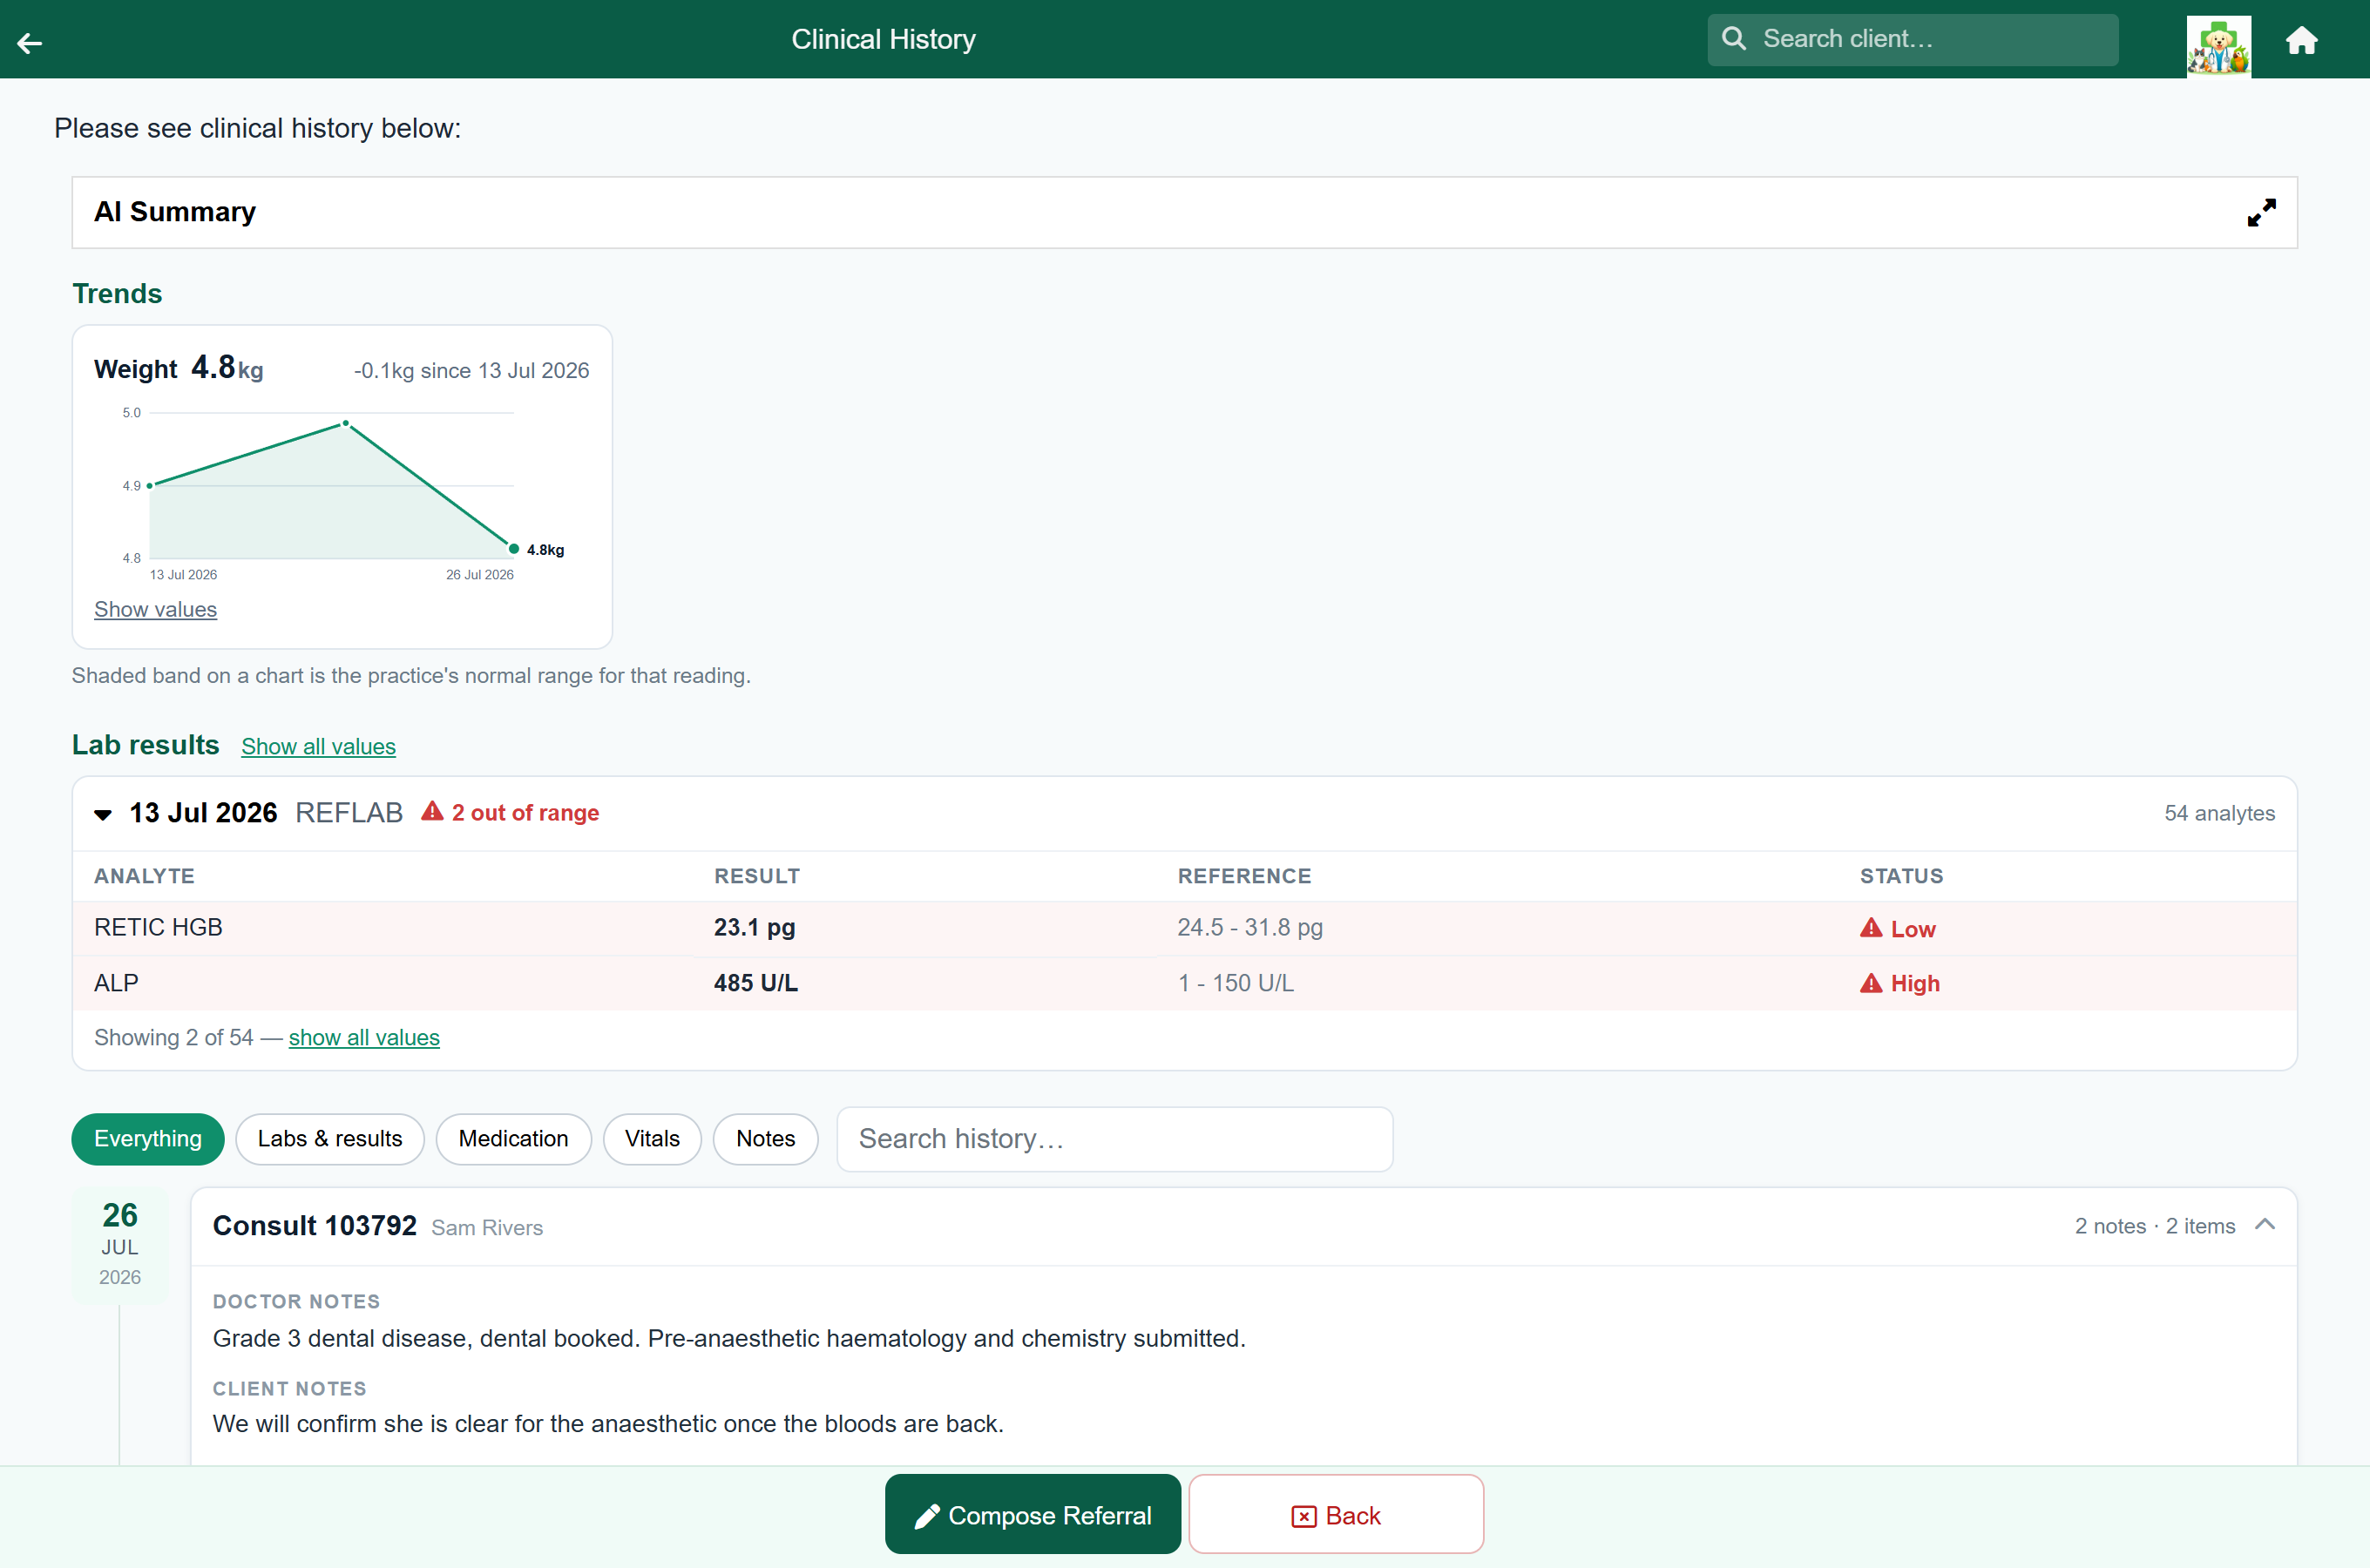
It has a topic of its own: Clinical history.
Merging duplicate clients#
Duplicates happen — somebody phones in and is registered again, or a surname is spelled differently. Merging folds one record into another, keeping all the history.
Home›Search Client›Merge Clients
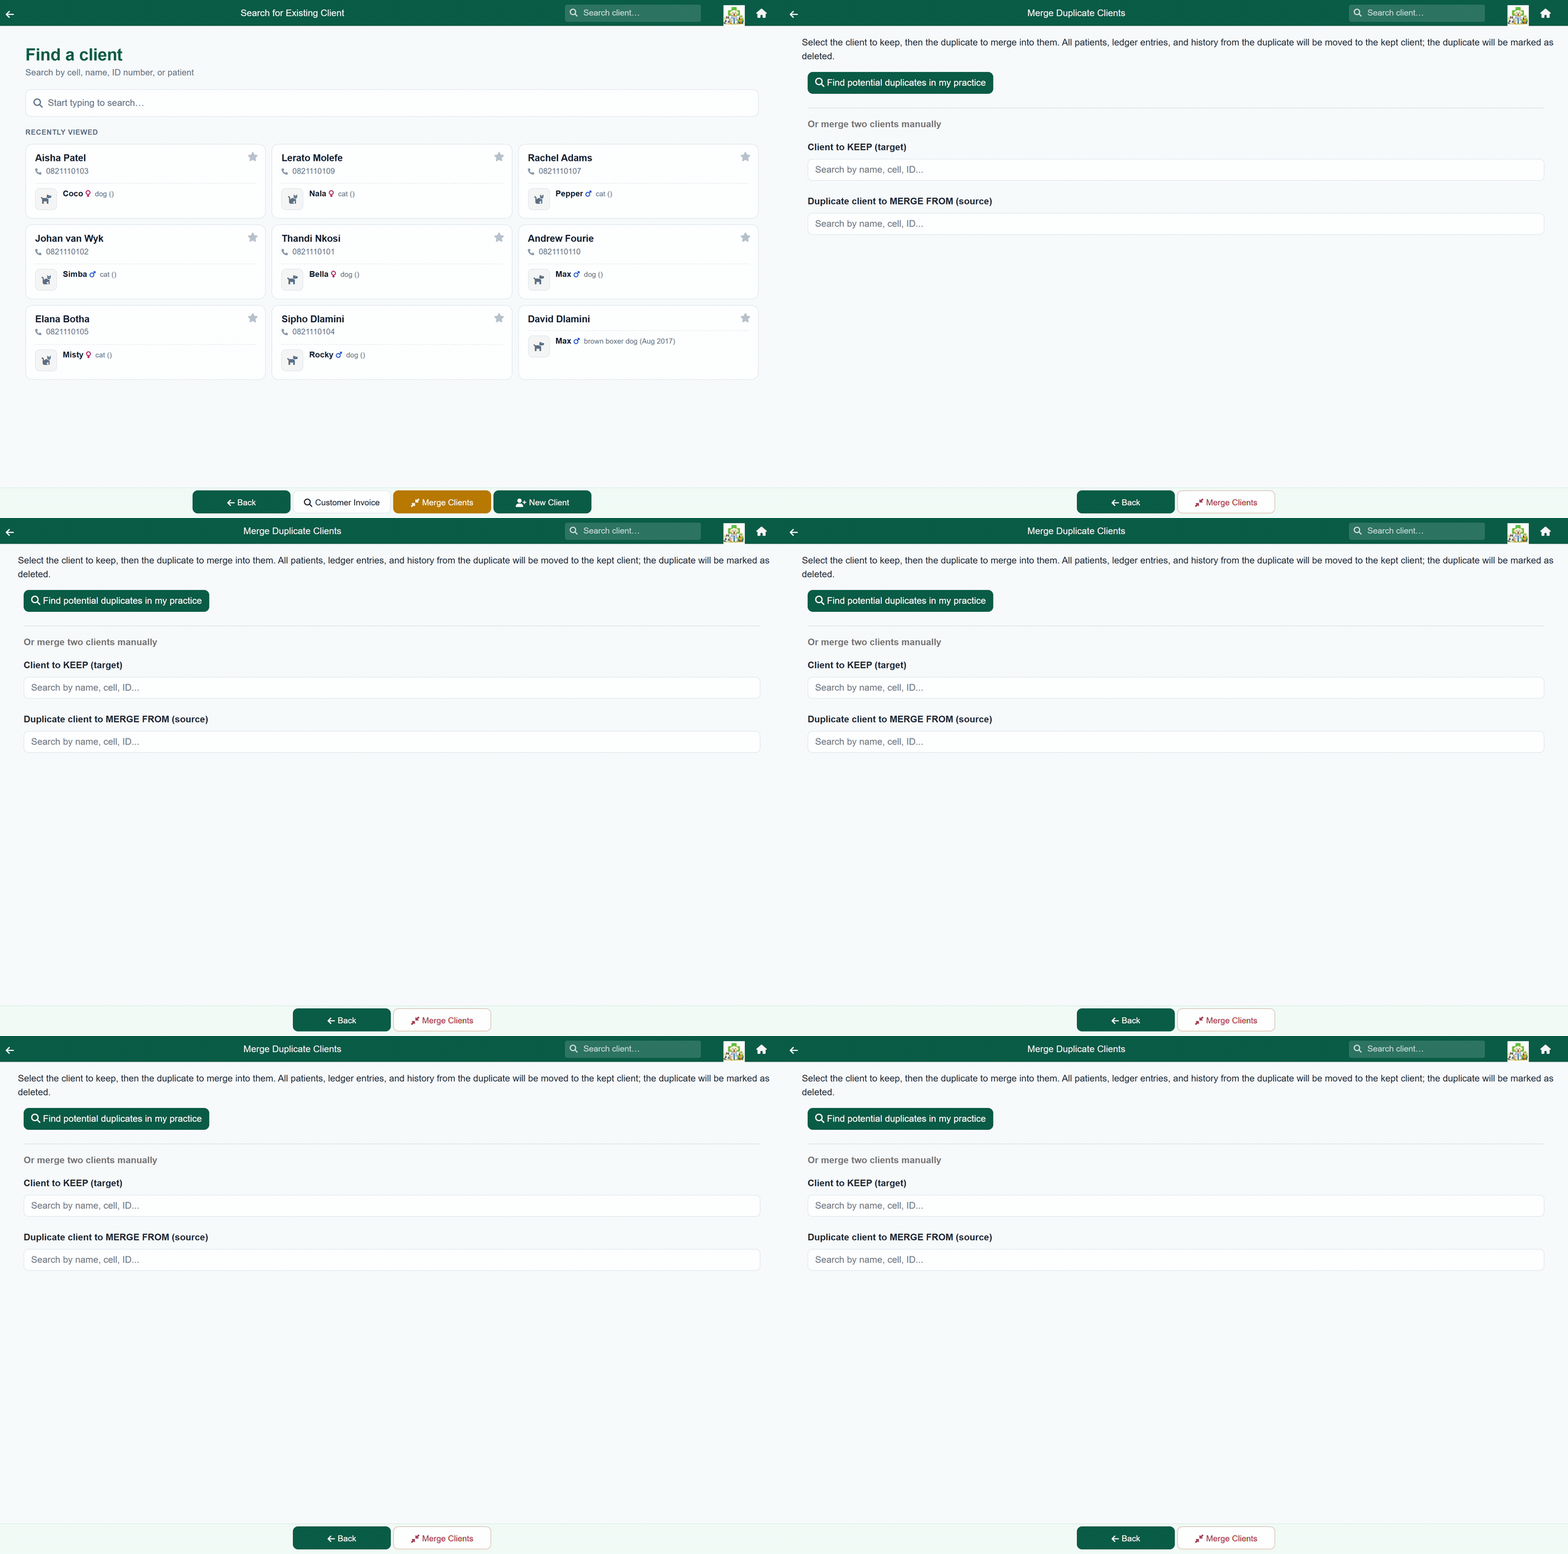
- From the client search choose Merge Clients.
- Find and select the record you want to keep.
- Find and select the duplicate to fold into it.
- Check the summary carefully — patients, invoices and ledger entries all move across.
- Confirm the merge.